How Jekyll can do the job06 June 2017 - 0 CommentsJekyll Recipe

Today I will show you how I automated my Jekyll deployments and why Jekyll roxx.
Even for regular git users like yours truely, this is a pain to use ten times a day (often more) the same lines of code. While there are tools to automate this, I wanted my own version. These are simple tasks and I don’t need extra software for that.
Morevover, I do have a thing going on with Jekyll. I love it. It’s a bit late, I agree, since the tech itself is getting old. But still. Show me something better and I will reconsider.
I am convinced that it can be easier to manage a Jekyll website than your typical wordpress website, as long a (decently) skilled developer designs it in the first place.
And it comes with a few side bonuses: it is more secure, it is static, the hosting is free with Github-Pages, this is fast, and you have a full record of every version with the ability to roll back the changes.
So I promote this. Even with non tech-savvy clients or maintainers, Jekyll can work like a breeze. That’s what I think, and what I experienced. But you need a little more of something else for the finishing touch. And that’s what this post is about.
Yep, I like to think that my grain of salt makes some of the difference. I make a few adjustement to the standard Jekyll dev setup and update process.
First, I create a Virtualbox image of an Ubuntu machine configured for Jekyll. I ask my client to unzip an archive containing both the Virtualbox image and 3 folders of the latest VirtualBox distribution for each OS on an USB stick. In case I don’t work remotely, I would rather give it to them directly.
They end up with an usb key with everything required to update and manage their website, whatever their OS are.
They just need to plug this usb key and launch the image, once Virtualbox is installed.
In there, they have their pre-configurated editing environement and a bunch of little scripts I made to ease their pain.
Let’s zoom on that. We’ll divide it into 3 steps, all aiming to help them do stuff painlessly.
The bash auto execution on click
Most of this depends on that basic feature. You can launch bash scripts on click. While this is no big deal for the common developer, this is a whole different thing for the end user. They don’t like to type in the console, who can blame them?
You can setup Ubuntu to execute bash files on click. With one click, they can execute a script to create a new article from a model, update their website, rollback their changes or anythign you can automate.
If they lost their USB stick, they can get a backup of the OS image file and clone the repo to start fresh. With one click again.
Bottom line, it empowers the user and reduce the difficulty of the task.
I learned how to achieve that in an answer from AskUbuntu:
Hit Alt+F2, type
dconf-editorand hit Enter.
In dconfg-editor goto:
org ➤ gnome ➤ nautilus ➤ preferences
Click on
executable-text-activationand from drop down menu select:
launch: to launch scripts as programs.
OR
ask: to ask what to do via a dialog.
Close dconf-editor. Thats it!
Thanks to the author.
Shortcuts
Well, ok. It looks like a cheesy upgrade. But everyone loves it. I make a desktop background with zones like this one:
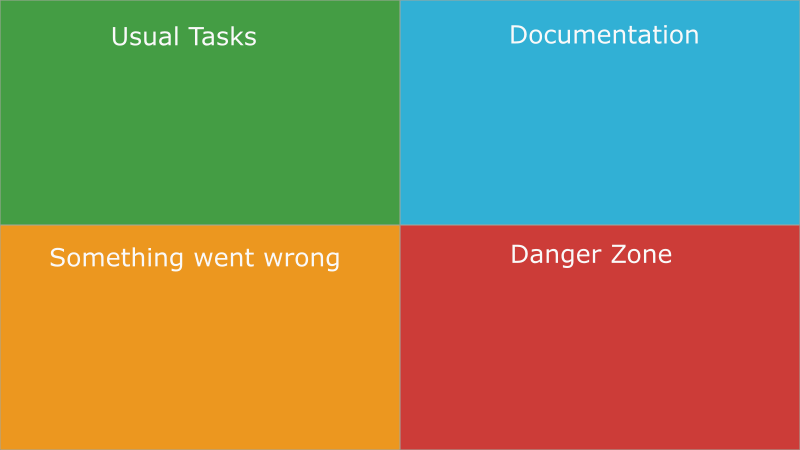
And in every zone I put the related scripts. What scripts, you might ask! Well, this is point 3.
Da scripts
I will divide them in the four areas you saw in the screenshot up there.
NOTE: I will update these list items to link them with the related scripts. Meanwhile, feel free to suggest another feature in the comments.
“Common tasks” zone
The title says it all. We have basic tasks + a few custom ones related to the blog specific needs :
- Write a new post
- open the latest post
- Compile and display the local version of the website
- Open the post folder
- Update the website
- Display the website
“Documentation” zone
Basic links to online documentation in order to help with the posts markups, + my own local documentation about what is what.
“Something went wrong” zone
Pretty self-explanatory too. I have a bunch of utility scripts to help my websites admins coping with common mistakes :
- Revert the previous push
- Submit a ticket for an issue on the website repo
- Open the website in the file explorer
“Danger zone”
In the same fashion that the github danger zone, it provides scripts for :
- Deleting the website
- Reset the local version and pull the current website
- Force push the current version on the website